Creating custom eyes for The Sims 4 is a great way to add your personal touch to the game. The whole process is really fun, and you can play with colors and forms until you’re satisfied with the end result.
Of course, designing realistic eyes requires advanced editing skills and a lot of patience.
Whether you want to create your first pair of custom eyes or you want to learn about alternative ways of doing that, this guide is for you.
How to Design Custom Eyes for The Sims 4
What you’ll need:
- Sims 4 Studio
- An image editing software
You’ll use the image editing program to play with colors, sizes, and other visual traits. You can use Photoshop or GIMP.
The first offers countless options and customization features but you need a license to unlock all the features, while the latter is free to use.
Sims 4 Studio is a great tool that you can use to create all kinds of custom content, including new textures for hair, eyes, or clothing.
Here are the steps to follow:
- Launch Sims 4 Studio
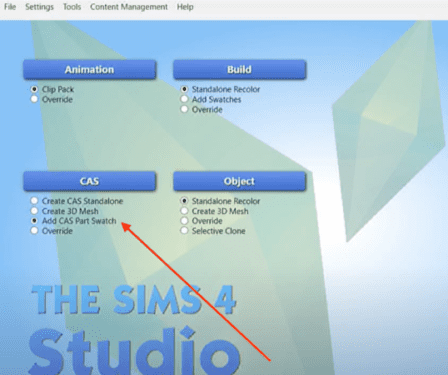
- Click on the CAS button
- Select Add CAS Part Swatch
- Click the CAS button again to open the customisation page
- Under Part Type, select Eye Colour
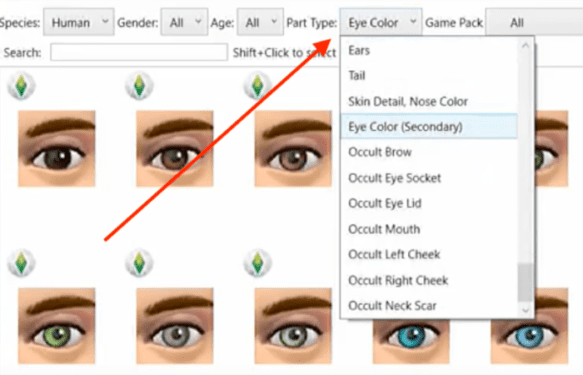
- Use the additional design options available such as Gender and Age to further customize the design of your eyes.
- Select the eye color design that you like
- A new window will pop up prompting you to name your package file
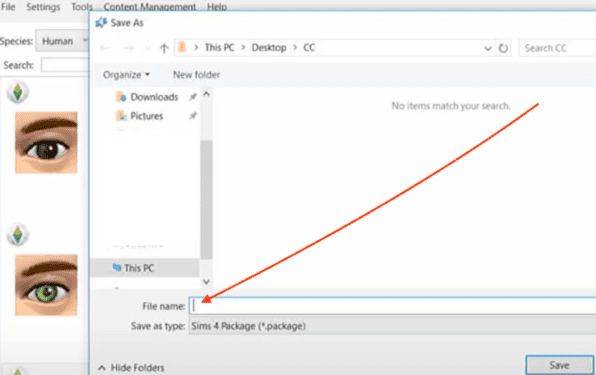
- Name and save your package file
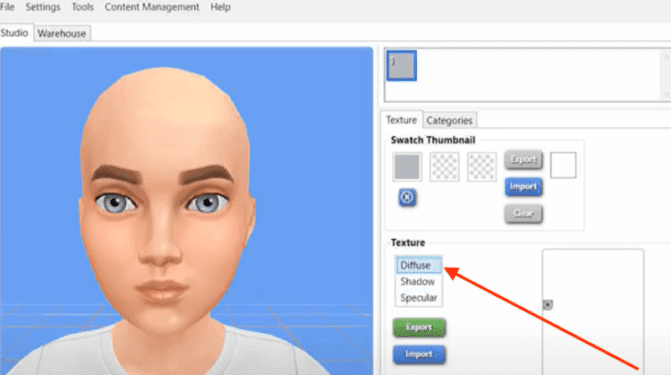
- Open it and further customize the texture
- Select Diffuse and export the new texture as a PNG file
- Open your texture file using your image editing software
- Further adjust the eye design by modifying the hue, saturation, and color
- Save the file when you’re happy with the end result
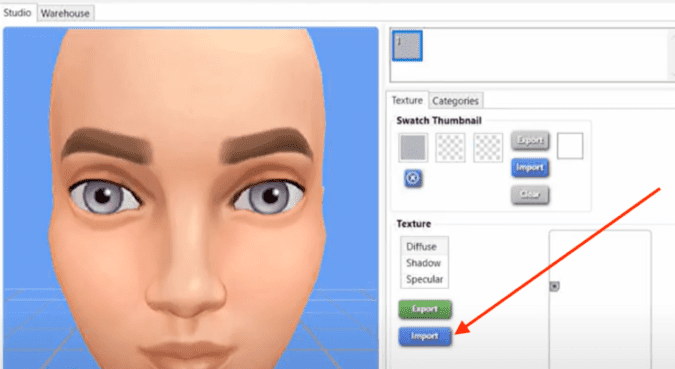
- Return to Sims 4 Studio where you opened your eye color package
- Select Import to import the texture file you just created
- Now open your Mods folder
- Add the newly-create package file in the Mods folder
- You can now use your new custom eyes on your Sims.
Tip: You can use Sims 4 Studio to create eye designs for cats and dogs as well.
Try using different eye shapes and colors to avoid The Same Face Syndrome.
⇒ Quick Notes:
If your custom eyes are not showing, especially after installing the latest Sims updates, this troubleshooting guide may save the day.
If you can’t change your Sim’s eye color, disable your mods, and change your Sim’s outfit.
References:
- How to create custom eye colors, TheCodeSimmer tutorial.