In order to stream on Twitch, the app needs to detect the games installed on your computer or gaming console. If you click on the Games tab, you should see a list of all the games available on your device.
But sometimes, Twitch may not recognized any of the installed games. Manually locating your games should work if the app fails to detect them.
But what do you do if Twitch can’t detect your games even if you try to locate them manually? Obviously, you need to pursue further troubleshooting steps.
⇒ Note: Certain games are banned on Twitch and that’s why they may not appear on the list. For more information, see What Games are Banned on Twitch?
Troubleshooting Twitch Not Detecting Games
Fix 1 – Close Twitch in Task Manager
You can start troubleshooting this issue by closing Twitch directly in the Task Manager.
- Click on the Windows Search bar, type task manager and launch the Task Manager app
- Right-click on Twitch and select End Task
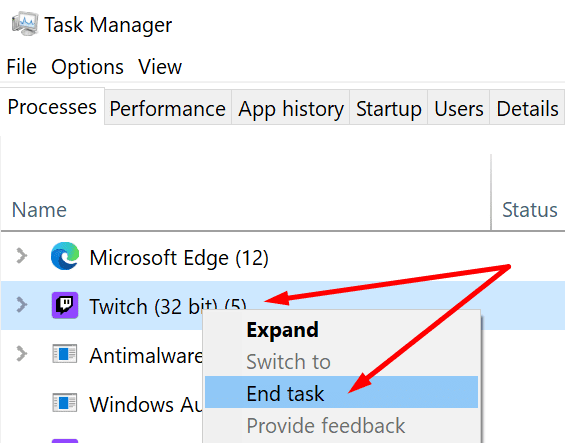
- Then launch Twitch again and check if the app detects your games now.
Also, make sure to sign in with the Twitch account you used to buy the respective game(s) in the first place. Or make sure the other accounts you used to purchase games with are linked to your Twitch account.
If this quick workaround did not yield positive results, go to the next solution.
Fix 2 – Refresh the app
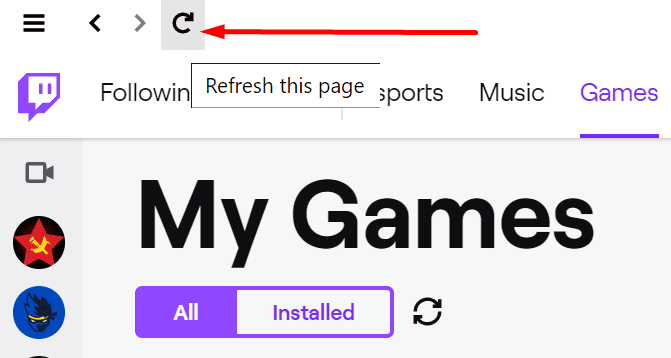
Another workaround that you can use consists in hitting the Refresh button in the top-left corner of the game client. Agreed, this is a rather slow workaround, but it might work for some users.
Start the app, wait for two or three minutes and then hit the Refresh button several times.
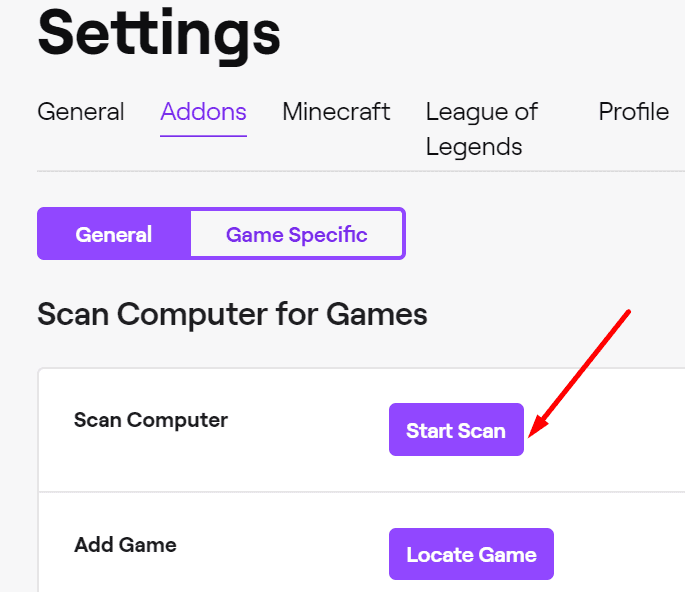
Alternatively, you can go into Settings → Addons → Scan now and do a new scan for games.
As strange as this might seem, it seems this issue occurs if Twitch servers are overloaded.
Waiting two or three minutes until the load reduces should allow the Twitch servers to respond to your request about the games.
⇒ You May Also Like: The Ultimate Twitch Channel Points Guide | Bonus FAQ
Fix 3 – Whitelist Twitch or disable your firewall and antivirus
Your firewall or antivirus might block Twitch or certain Twitch features if certain client files appear suspicious. This usually happens shortly after you download the latest Twitch version because the databases that your security tools rely on are not updated accordingly.
To work your way around this issue, whitelist Twitch in your firewall or antivirus settings.
- If you’re using Windows Firewall, open the Control Panel, type firewall in the search box and select Allow an app through Windows Firewall
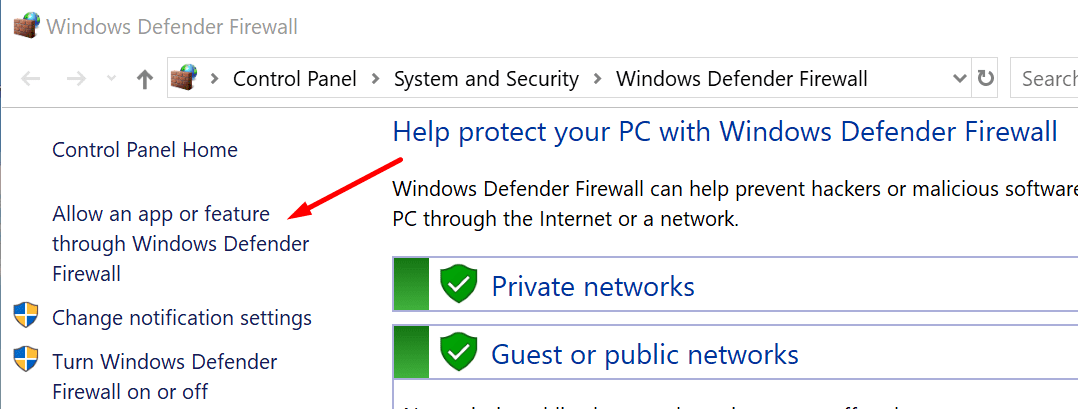
- Click on the Change Settings button and add Twitch to the list
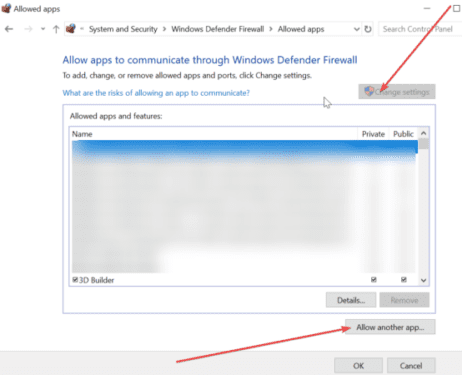
To whitelist Twitch in your antivirus settings, do this:
- Go to Settings → Update & Security → Windows Security
- Navigate to Virus & threat protection
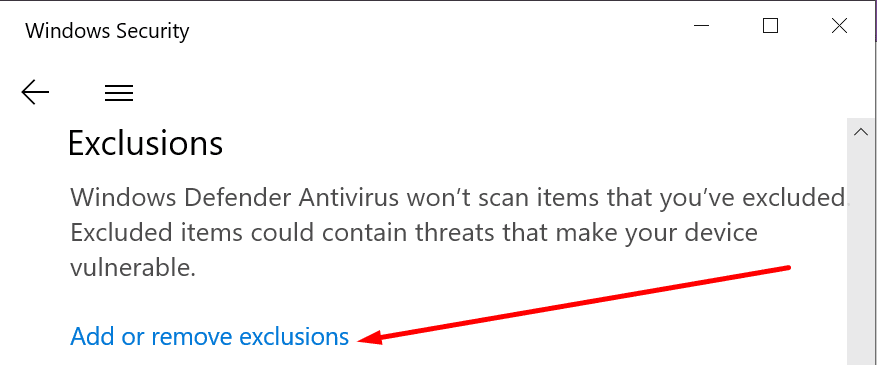
- Click Manage settings, and go to Exclusions
- Select Add or remove exclusions
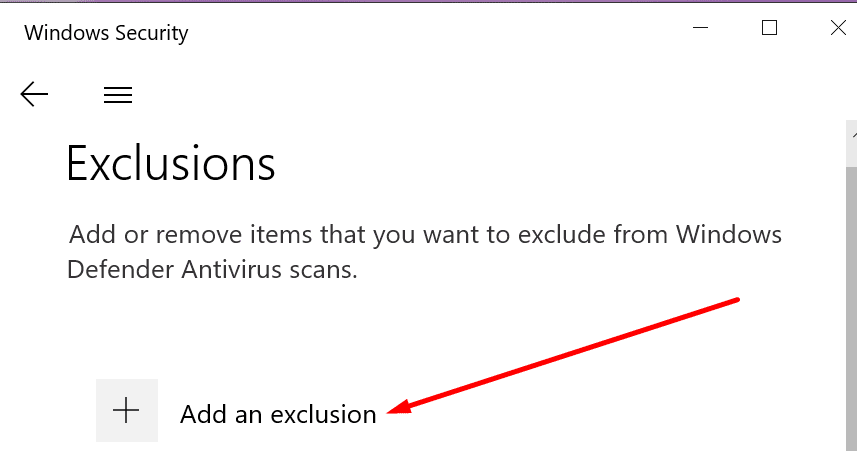
- Select Add an exclusion, and then locate and select the Twitch folder
If you use non-Microsoft firewall and antivirus software, go to the official support page of the respective tools for step-by-step instructions.
⇒ Here’s Something Interesting: How to Blacklist Words in Twitch Chat
Fix 4 – Repair the folder
If your games are still not showing up on Twitch, repair your folder permissions.
- Go to account → Repair Folder Permissions → Repair → Done
- Log out and then log back in and navigate to your Games tab.
Fix 5 – Change the language settings
Some users confirmed they fixed this issue by changing the language settings.
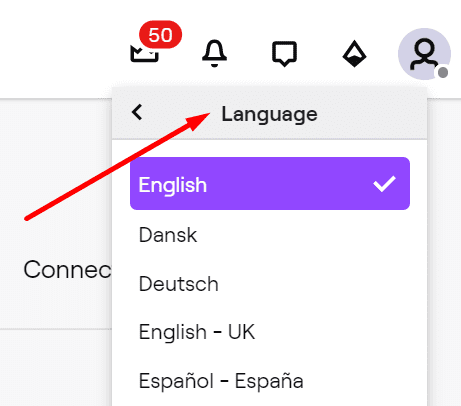
For example, if your Twitch UI is in English, change it to another language, watch a stream for one minute and then change it back to English.
To change the language settings on Twitch, go to Settings → General → Preferences → Language.
We hope something helps.